Review, set-up, and using the Celestron Powerseeker 127AZ Astronomy Telescope Kit.
2 Comments8 August 2022 | Admin

My initial thoughts upon receiving the Celestron Powerseeker 127AZ kit was “wow, it's huge”. The box it ships in is actually quite large. 80 odd cm long !! Inside were various smaller boxes, with the main body of the telescope in (thankfully) a much smaller box. A few other boxes house the tripod, viewing optics (4 mm, 20 mm, 3x Barlow lens and 4 mm moon filter) and a smartphone holder. I was a little apprehensive, wondering how difficult it would actually be putting this thing together.
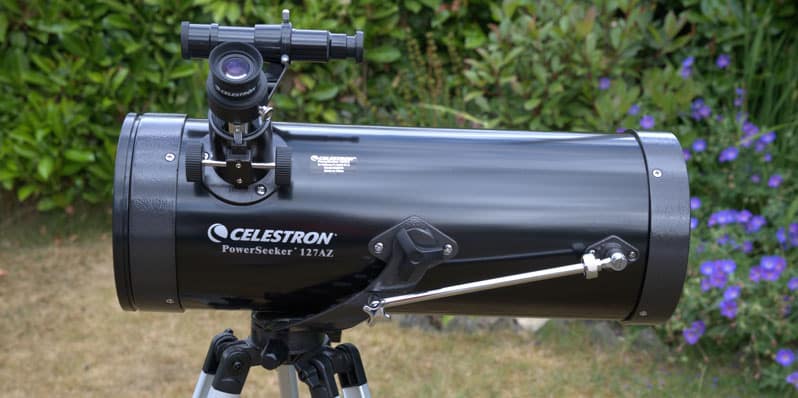
I was also expecting a lot of plastic inside those boxes. At this price point (below £200), I wasn’t expecting the telescope to be oozing with quality. The first box I opened contained the main body of the scope, and, I was pleasantly surprised to find that the telescope body is actually metal, not plastic. Though still lightweight, it does feel fairly robust. The body is only 45 cm long with a body diameter of just over 16 cm. Overall, it does feel fairly easy to transport, being lightweight and not too bulky.
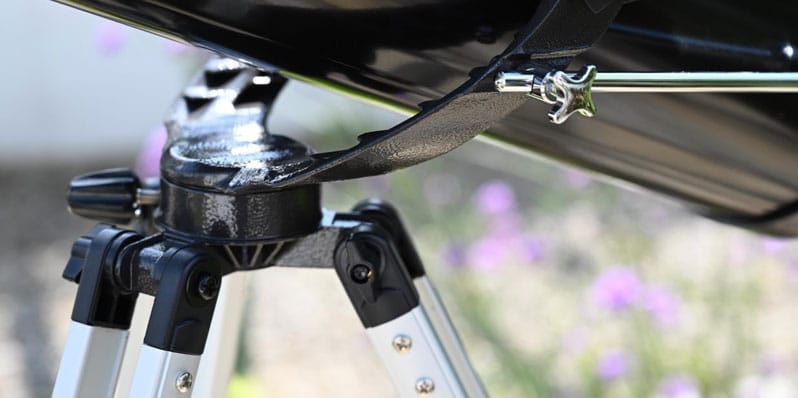
In terms of set-up, it's actually very easy to assemble. It comes with a fairly decent manual with simple to follow instructions. The main body mounts to the tripod via 2 lugs (held in place by 2 wing nuts) with a chrome adjustment rod (known as a slow motion control rod) that locks the vertical position of the tripod with a thumb screw. Horizontal pan can be locked via a thumbscrew on the tripod itself. The tripod itself won't win any beauty prizes, but it is functional. It's lightweight but, once locked into place, provides a fairly sturdy platform for the telescope. Height adjustment of the tripod is wide-ranging and allows for kids to adults, to be able to view through the eyepiece easily. Installing the optics is very simple, as is the finderscope. All secured by thumbscrews.

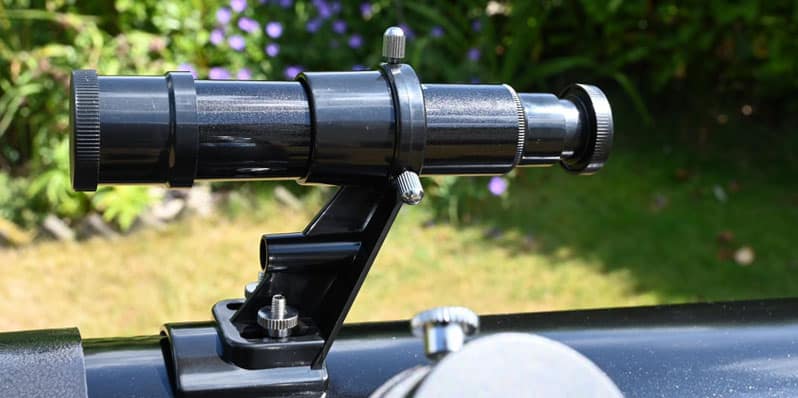
This is where things start to show that this may not be a beginners scope. To get the most out of it, you will need patience. At 1000 mm focal length, it can be a little tricky to use. The finderscope bolts to the main body of the telescope via 2 thumb screws and has 3 small adjustment thumbscrews, to allow for fine-tuning of alignment of the finderscope with the main telescope body. To get this right will take time and a considerable amount of patience. I found this to be quite tricky, as the finderscope doesn’t seem to have the same levels of quality as the main telescope body. Adjustment via the tiny thumbscrews seemed to be quite hit or miss and not that easy. It would require re-adjustment every time the finderscope is re-mounted to the telescope body, although you can of course leave it in place.

Positioning this Powerseeker Telescope to a target is done via your own hand and then locking the vertical axis via the slow motion control rod. A lot of range exists in the vertical axis, from horizontal to almost vertical. I did find that there is a tiny bit of play in the slow motion control rod, so I found that once I had positioned the telescope to a target (the moon for example) and then locked it into place, I lost the target as soon as I removed my hand. I almost had to position the scope below the target, lock it and then when I released the telescope body, it would then be on target. The power of this telescope does make it a little harder to use. At 1000 mm, a tiny nudge will shake it off target. I found when viewing through the eyepiece, I couldn’t touch the body of the telescope at all as a lot of ‘shake’ was clearly visible. However, you have to remind yourself that this is a sub £200 telescope, and you simply won't get the stability you would, if you spent 10 x that figure.
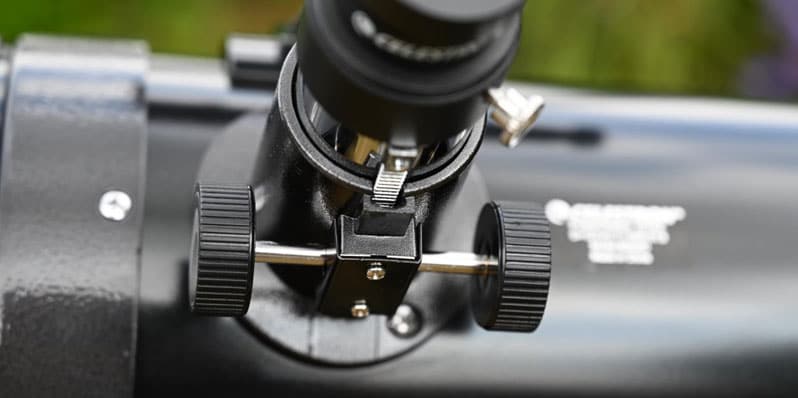
Focussing the viewing optics is done via a nice chunky thumb wheel that moves (via a gear system) the viewing optics in and out of the body. It's smooth, but does make some noise. Almost sounds like scrunching plastic film, but could be just from lubrication in the mechanism. Nevertheless, its solid. Once you position it into focus, it doesn’t move unless you turn that thumb wheel.

The 127AZ also comes with some tools to adjust the secondary mirror. It's great that it has that level of adjustment, but that has got to be a task a beginner would never attempt. I didn’t attempt, didn’t need to, but it’s a job I wouldn’t attempt.
The 127az also comes with a smartphone adapter to attach your phone to the various Telescope Eyepieces, so that you can photograph what you can see. I found this a bit easier to set up that say aligning the finderscope, but using your phone camera can also be a little tricky. This highlighted just how little I know my way around my own phone camera. I also found that you need to keep the optics spotless, as the phone may decide to focus on dust on the optics rather than your intended target.
To sum up, I wouldn’t recommend this to an absolute beginner. You will need to get to know your way around a telescope and have some experience in setting one up to get the most out of it. You will need patience, but if you have that and time, it’s a lot of telescopefor not a lot of money.
Review by Justin L

Great review and definitely gave us a heads up.