Set up & use of the Browning Recon Force Elite HP4 Trailcam wildlife camera18 January 2024 | Admin
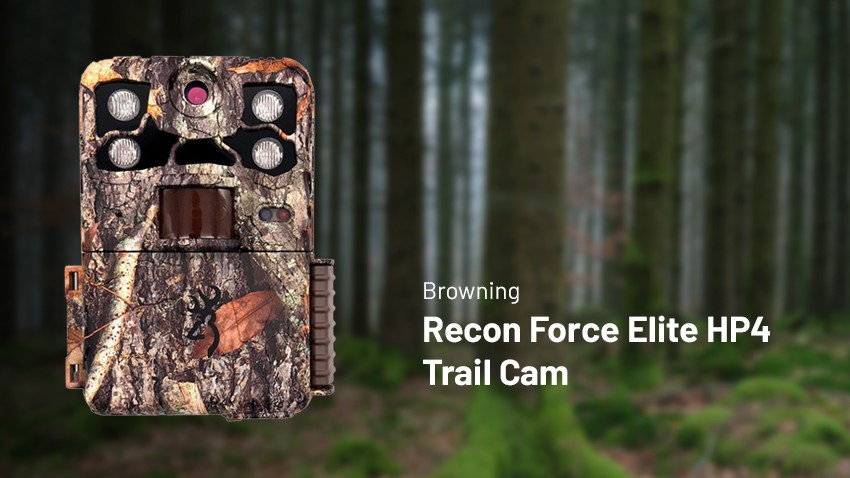
I was given the opportunity to play with a Browning Trailcam in the summer, somewhat of a departure from the typically camera related gear that I have a habit of acquiring. The Browning Recon Force Elite HP4 Trailcam wildlife camera is basically a camera in a box, with a motion sensor. When something moves in front of the sensor, the camera is triggered, capturing stills or video. Since this process happens automatically, not requiring a human to release the shutter, you are able to get close to wildlife that would normally be scared off by people. The idea behind the device is to affix it to something fairly rigid, switch it on, and simply walk away. When I first opened the packaging to the Browning Recon Force Elite HP4 trailcam, I went hunting for the instruction manual. Iím not an avid reader of manuals, but in the past, a quick flip through has proven to be a reasonable starting point. Sadly, my copy didnít seem to have a manual, so the next port of call was Browningís website. Admittedly, I didnít spend long on the site, but again, no manual to be found the short while I was there. Back to the device it was. Controls for the Browning Trailcam are hidden behind a solid cover, fastened by a hefty flip catch (more on that later). Lifting the lid so to speak exposes a small colour LCD screen and a few soft buttons and an on/off switch. Switching on the device brings the display and menu to life, where you can navigate settings such as switching between capture modes (photo or HD video) and trigger speed etc. Navigation is fairly simple thankfully, the menu system is also quite simple. As well as adjusting settings, it is possible to view captured images on the display, with captured images stored on an SD card for easy transfer to a PC or Mac. In terms of setting the device up to capture images, in all honesty, I really didnít spend very long looking at these settings. I simply set it to photo mode and closed the lid !! Construction of the trailcam is very robust to say the least. Made from a hefty feel plastic it, it has a steel pinned hinged door/cover, secured by a solid plastic lock/catch. This part of the trailcam also has a gasket/seal to keep moisture out. No dramas in leaving this outside. The front of the unit is camo and green on the back. It's not making It invisible, but I doubt animals will find it offensive or scary. On the back of the trailcam are 2 metal brackets with teeth to grip a tree (or similar) and loops in which the (supplied) webbing/strap passes through. Affixing the trailcam to a tree is simple. Pass the strap through the metal brackets, around the tree or wooden post, and thread the open end through the metal fastener at the other end of the strap. Pull it tight and it's not going anywhere. The strap is actually almost too long, but that means it will go around larger tree trunks. The trickiest part to deploying the Browning Recon Force Elite HP4 trailcam is figuring out where in the garden, woods, field etc, to position it. As I mentioned earlier, I didnít spend long configuring before I deployed it to the garden. Though it comes with 4 LED lights to turn night into day, I managed to not select that option. Which turned out to be fine, as when the light levels drop beyond a threshold, it switches to Infra red mode and then back to Ďnormalí mode when light levels increase. Image quality (at 12mp) is perfectly acceptable for this type of device. The trailcam has a small lens (when compared to an actual digital camera) and so the images are never going to be comparable to what you can get out of a DSLR. Perhaps this could be improved upon with some menu tweaking, but I wouldnít imagine by much. I am probably being a little unfair here (very unfair) as it's just not realistic to even try to compare trailcam images with DSLR images. That said, a DSLR won't really take a photo for you, nor will it automatically switch to IR mode for middle of the night shots. DSLR also tend to have far more complicated menuís, they donít have the simplicity and ease of use that this trailcam has. Maybe going to 22mp on the trailcam may yield (slightly) better results? The trailcam sits in a unique category where you donít need in depth technical knowledge to set up, but it allows you to get way closer to wildlife than you ever could when holding a camera. Iím sure it also has other uses. In all honesty, Iím scratching my head as to what those other uses could be. Judging by the fact itís mostly camouflaged, Iím guessing that Browning also see capturing wildlife as the trailcamís purpose. One (probably obvious) tip I would have for this trailcam, is to get familiar with different types of bait and who/what might want to eat it!! Dropping some food in front of it is a great way to encourage animals to get really close. However, try to use something that cats wonít like !! Review by Justin L.
|
